Supported basic Arduino functions#
Packages the basic functions of the Arduino IDE, allowing you to program the DevLab Development Board using the familiar Arduino environment. This includes digital and analog I/O operations, PWM control, serial communication, and more.
https://raw.githubusercontent.com/UNIT-Electronics-MX/unit_electronics_py32_arduino_package/main/package_unit_electronics_py32_index.json
Learn how to program the DevLab: PY32F003L24D6TR development board using Arduino IDE and the CH552 Multi-Protocol Programmer in CMSIS-DAP mode.
Rapid prototyping
Embedded systems education
Wearable device development
These resources are sufficient for a wide range of control, signal acquisition, and communication applications.
Materials Required#
To program the DevLab: PY32F003L24D6TR using Arduino IDE, you will need:
USB Type-C cable
JST 1.0 mm cable (4-pin)
Arduino IDE installed on your computer
DevLab: PY32F003L24D6TR board
DevLab: CH552 Multi-Protocol Programmer
Required Installations#
This tutorial uses the pyOCD Debugger, therefore the following must be installed:
Python (installed on your system)
pyOCD (Python package)
CMSIS-DAP Mode#
The programmer must operate in CMSIS-DAP mode.
The following repository contains all available firmware images for the Multi-Protocol Programmer. For this tutorial, you only need:
cmsis_dap.bin
Firmware – CMSIS-DAP#
Warning
Before connecting the programmer, make sure the device is powered with +5 V. Use the onboard voltage selector switch to choose the correct supply level.
Flashing the Programmer#
Use WCHISPStudio to flash the file cmsis_dap.bin to the
Multi-Protocol Programmer.
Wait until the update process is complete before using the programmer in CMSIS-DAP mode.
Refer to the official tutorial for more details:
WCHISPStudio Tutorial
Additional Boards Manager (Arduino IDE)#
Open Arduino IDE
Go to File > Preferences
In Additional Boards Manager URLs, paste the following URL:
https://raw.githubusercontent.com/UNIT-Electronics-MX/unit_electronics_py32_arduino_package/main/package_unit_electronics_py32_index.json
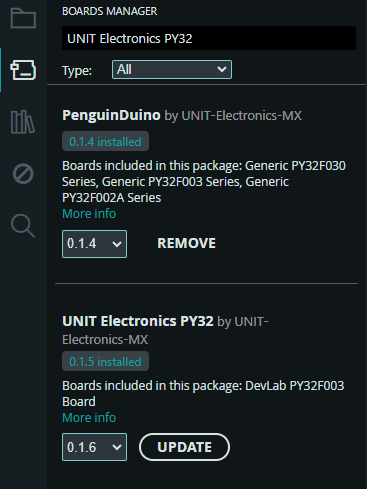
Board Manager#
Open Boards Manager
Search for “UNIT Electronics PY32”
Install the package
Selecting the Board#
In Arduino IDE, select:
Tools > Board > UNIT DevLab: PY32F003
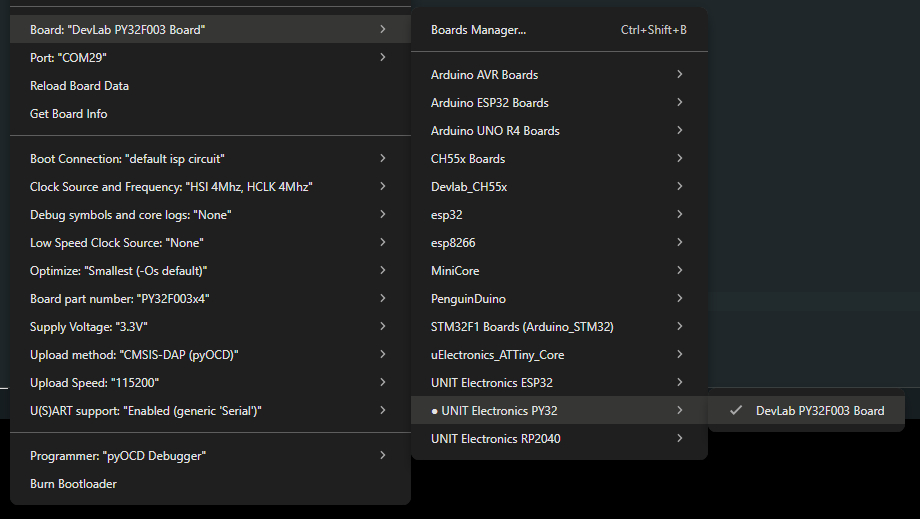
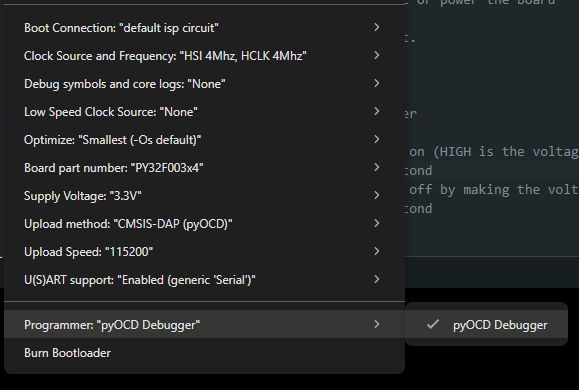
Programmer Selection#
Select the programmer:
Tools > Programmer > pyOCD Debugger
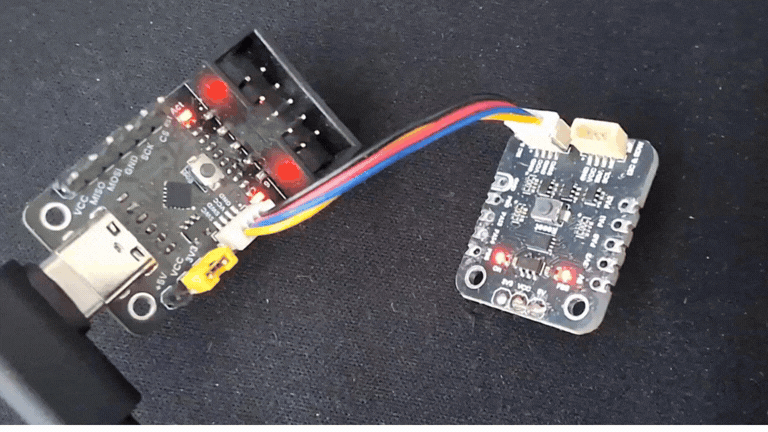
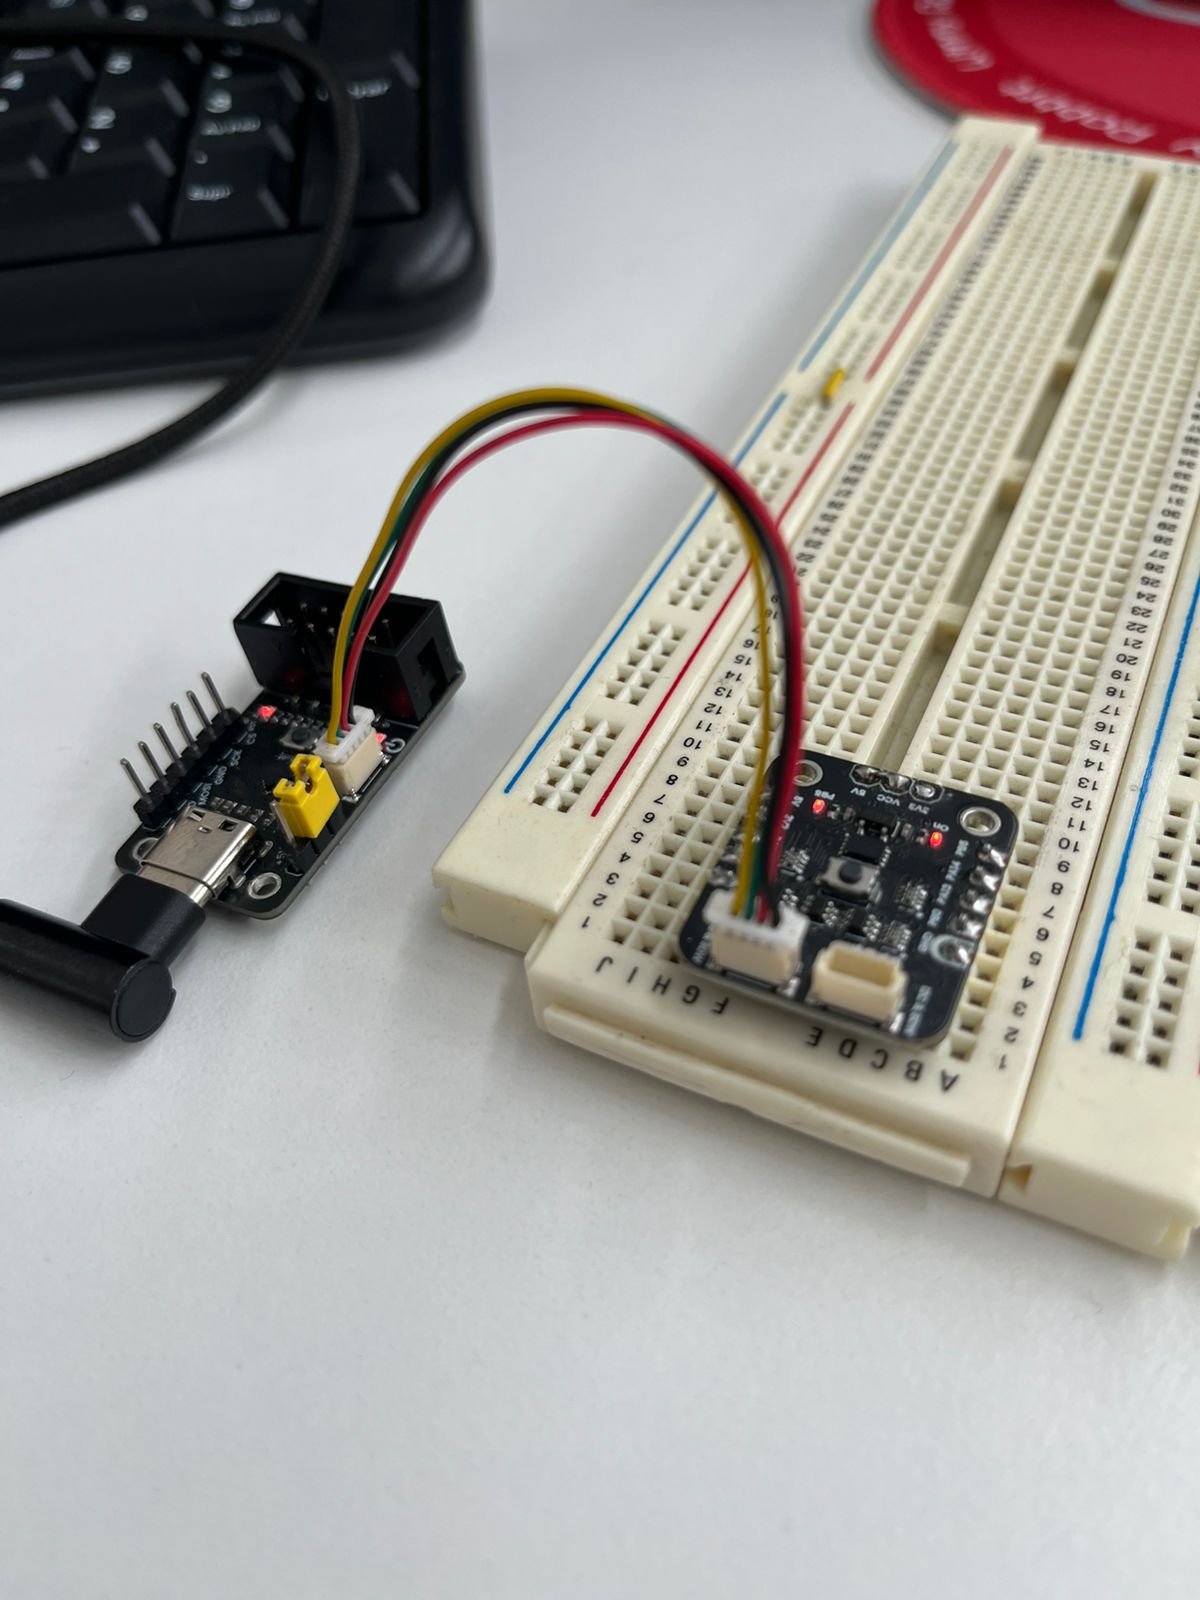
Connections#
With the Multi-Protocol Programmer operating in CMSIS-DAP mode and the DevLab board already selected in Arduino IDE, follow the steps below.
Step-by-step connection#
Connect the CH552 Multi-Protocol Programmer to your computer using a USB cable.
Using a JST 1.0 mm (4-pin) cable, connect the programmer to the DevLab: PY32F003L24D6TR board.
Verify that the SWD signals are correctly aligned between both devices.
Required pin alignment#
The following signals must match exactly between the programmer and the board:
VCC – Target power
GND – Ground reference
SWDIO – SWD data line
SWCLK – SWD clock line
Connection reference#
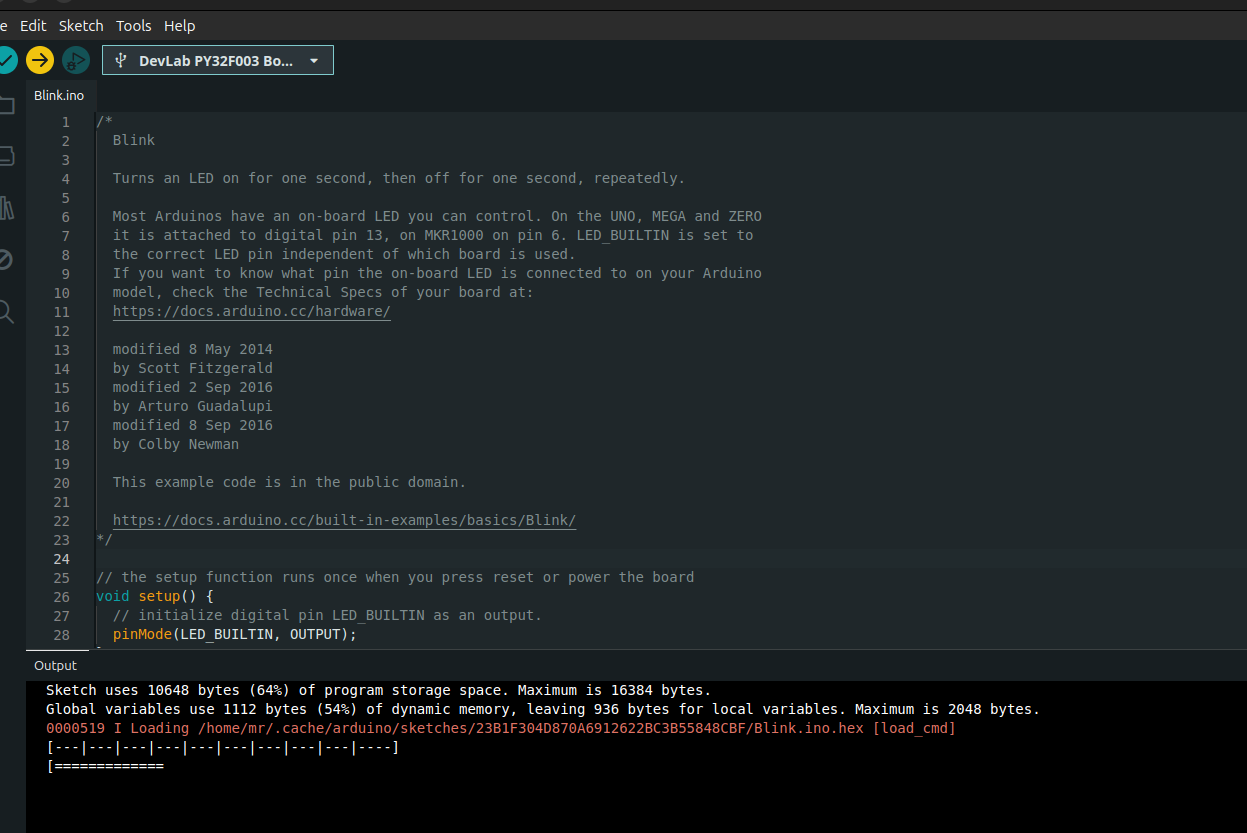
Example Code (Blink)#
Compile and upload the following example to blink the onboard LED.
Note
It is not necessary to select a COM port, since programming is performed via CMSIS-DAP.
void setup() {
  // Initialize digital pin LED_BUILTIN as an output
  pinMode(LED_BUILTIN, OUTPUT);
}

void loop() {
  digitalWrite(LED_BUILTIN, HIGH);  // LED ON
  delay(500);
  digitalWrite(LED_BUILTIN, LOW);   // LED OFF
  delay(500);
}
Once the connections are completed and verified, the DevLab: PY32F003L24D6TR is correctly connected to the CH552 Multi-Protocol Programmer and ready to be programmed using Arduino IDE via CMSIS-DAP.
Flashing Firmware operation#