Desktop Environment#
The environment setup is the first step to start working with the PULSAR C6 board. The following steps will guide you through the setup process.
Install the required software
Set up the development environment
Install the required libraries
Set up the board
Install the required software#
The following software is required to start working with the PULSAR C6 board:
Python 3.7 or later: Python is required to run the scripts and tools provided by the PULSAR C6 board.
Git: Git is required to clone the PULSAR C6 board repository.
MinGW: MinGW is a native Windows port of the GNU Compiler Collection (GCC), with freely distributable import libraries and header files for building native Windows applications.
Visual Studio Code: Visual Studio Code is a code editor that is required to write and compile the code.
This section will guide you through the installation process of the required software.
Python 3.7 or later#
Python is a programming language that is required to run the scripts and tools,
To install Python, follow the instructions below:
Download the Python installer from the:
Run the installer and follow the instructions.
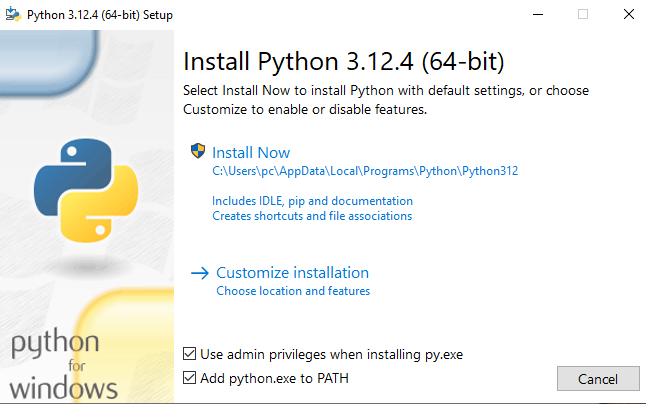
Fig. 3 Add python to PATH#
Attention
Make sure to check the box that says “Add Python to PATH” during the installation process.
Open a terminal and run the following command to verify the installation:
python --version
If the installation was successful, you should see the Python version number.
Git#
Git is a version control system that is required to clone the repositories in general. To install Git, follow the instructions below:
Download the Git installer from the
Run the installer and follow the instructions.
Open a terminal and run the following command to verify the installation:
git --version
If the installation was successful, you should see the Git version number.
MinGW#
MinGW is a native Windows port of the GNU Compiler Collection (GCC), with freely distributable import libraries and header files for building native Windows applications. MinGW provides a complete Open Source programming toolset that is suitable for the development of native Windows applications, and which do not depend on any 3rd-party C-Runtime DLLs. MinGW, being Minimalist, does not, and never will, attempt to provide a POSIX runtime environment for POSIX application deployment on MS-Windows. If you want POSIX application deployment on this platform, please consider Cygwin instead.
To install MinGW, follow the instructions below:
Download the MinGW installer from the
Run the installer and follow the instructions.
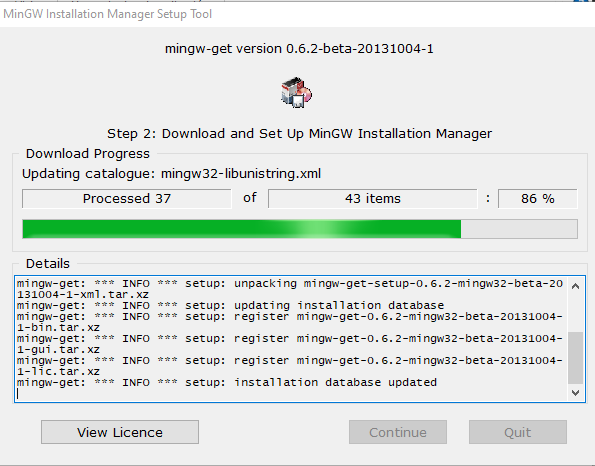
Fig. 4 MinGW installer#
Note
During the installation process, make sure to select the following packages:
mingw32-base
mingw32-gcc-g++
msys-base
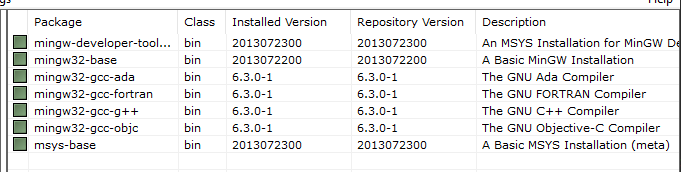
Fig. 5 MinGW installation#
Open a terminal and run the following command to verify the installation:
mingw --version
If the installation was successful, you should see the MinGW version number.
Environment Variable Configuration#
Remember that for Windows operating systems, an extra step is necessary, which is to open the environment variable -> Edit environment variable:
C:\MinGW\bin
Locate the file#
After installing MinGW, you will need to locate the mingw32-make.exe file. This file is typically found in the C:/MinGW/bin directory. Once located, rename the file to make.exe.
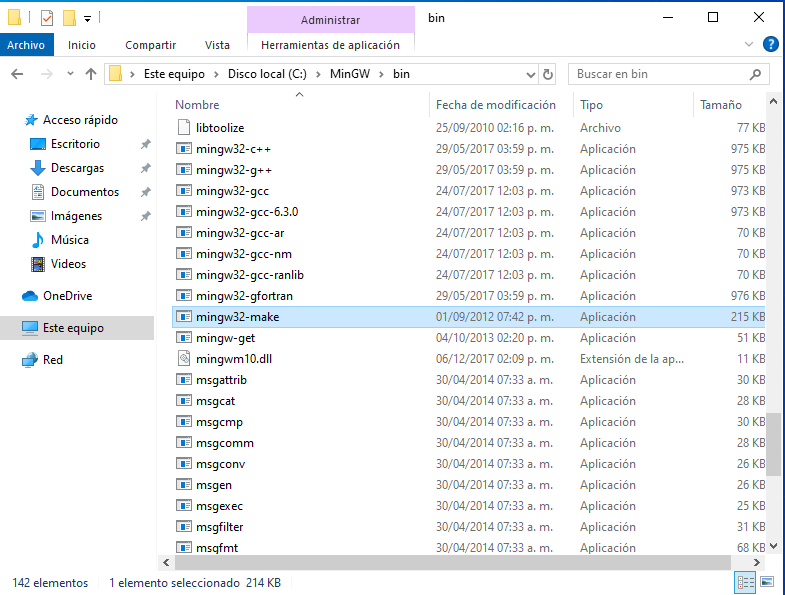
Fig. 6 Locating the mingw32-make.exe file#
Rename it#
After locating mingw32-make.exe, rename it to make.exe. This change is necessary for compatibility with many build scripts that expect the command to be named make.
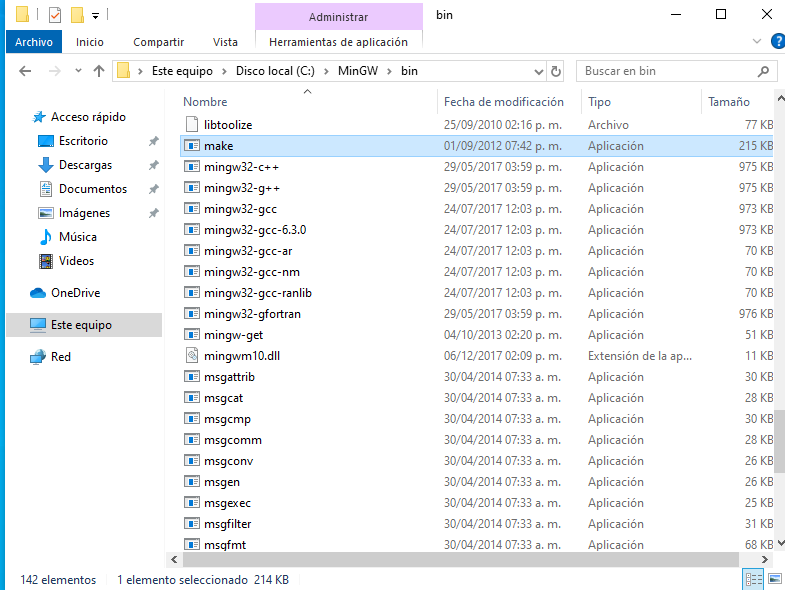
Fig. 7 Renaming mingw32-make.exe to make.exe#
Warning
If you encounter any issues, create a copy of the file and then rename the copy to make.exe.
Add the path to the environment variable#
Next, you need to add the path to the MinGW bin directory to your system’s environment variables. This allows the make command to be recognized from any command prompt.
Open the Start Search, type in “env”, and select “Edit the system environment variables”.
In the System Properties window, click on the “Environment Variables” button.
In the Environment Variables window, under “System variables”, select the “Path” variable and click “Edit”.
In the Edit Environment Variable window, click “New” and add the path:
C:\MinGW\bin
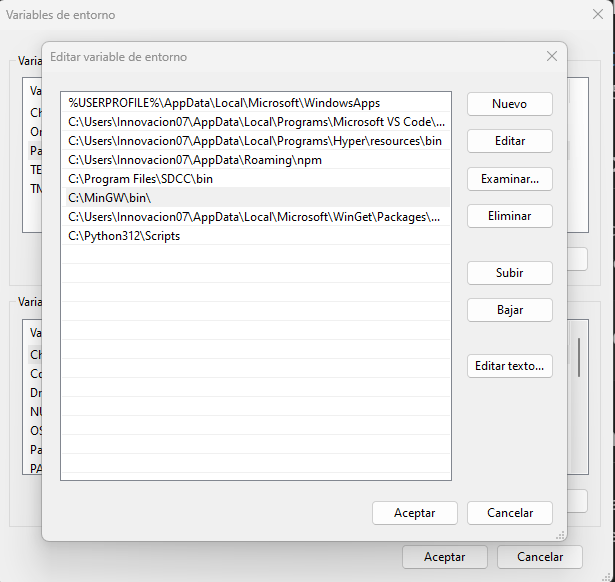
Fig. 8 Adding MinGW bin directory to environment variables#
Visual Studio Code#
Visual Studio Code is a code editor that is required to write and compile the code.
To install Visual Studio Code, follow the instructions below:
Download the Visual Studio Code installer from the
Run the installer and follow the instructions.
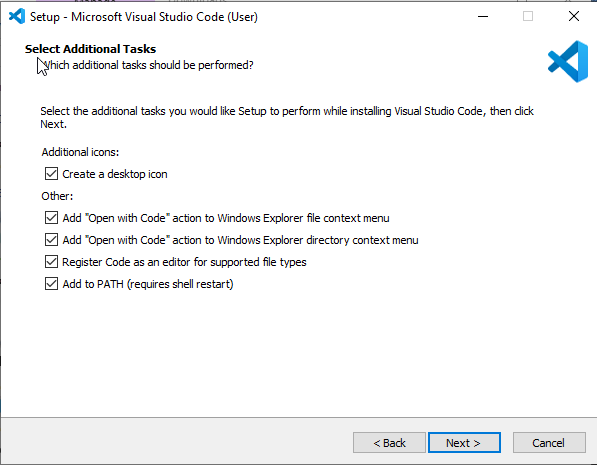
Fig. 9 Visual Studio Code installer#
Note
During the installation process, make sure to check the box that says “Open with Code”.
Open a terminal and run the following command to verify the installation:
code --version
Install extensions for Visual Studio Code:
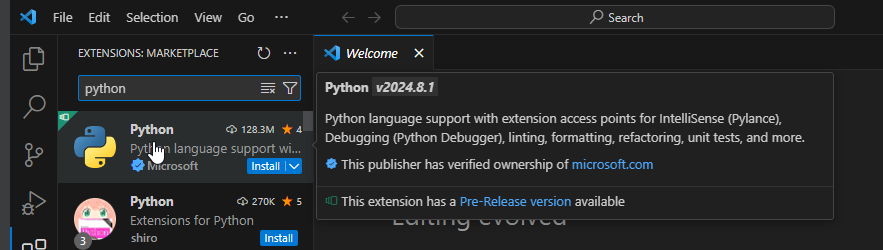
Fig. 10 Visual Studio Code extensions#
Arduino IDE Installation#
The Arduino IDE is a popular open-source platform for building and programming microcontroller-based projects. It provides a user-friendly interface and a wide range of libraries to simplify the development process.
To install the Arduino IDE, follow the instructions for your operating system in the
Unit Electronics Package Installation Guide.Thonny IDE Installation#
Thonny is a Python IDE that is designed for beginners. It provides a simple interface and built-in support for MicroPython, making it an excellent choice for programming the PULSAR C6 board.
Follow the instructions for your operating system in the
Micropython Compatibility Guide.