AVR: Arduino IDE Bootloader#
Installing the Bootloader on ATMEGA328P#
This guide explains how to flash the Arduino-compatible bootloader onto an ATMEGA328 microcontroller using the UNIT USB Multi-Protocol Programmer. By following these steps, your ATMEGA328 can function as an ATMEGA328P, fully compatible with the Arduino IDE.
Required Materials#
Multi-Protocol Programmer

Multi-Protocol Programmer
ATMEGA328P Microcontroller
ATMEGA328P Microcontroller
Hardware Connection#
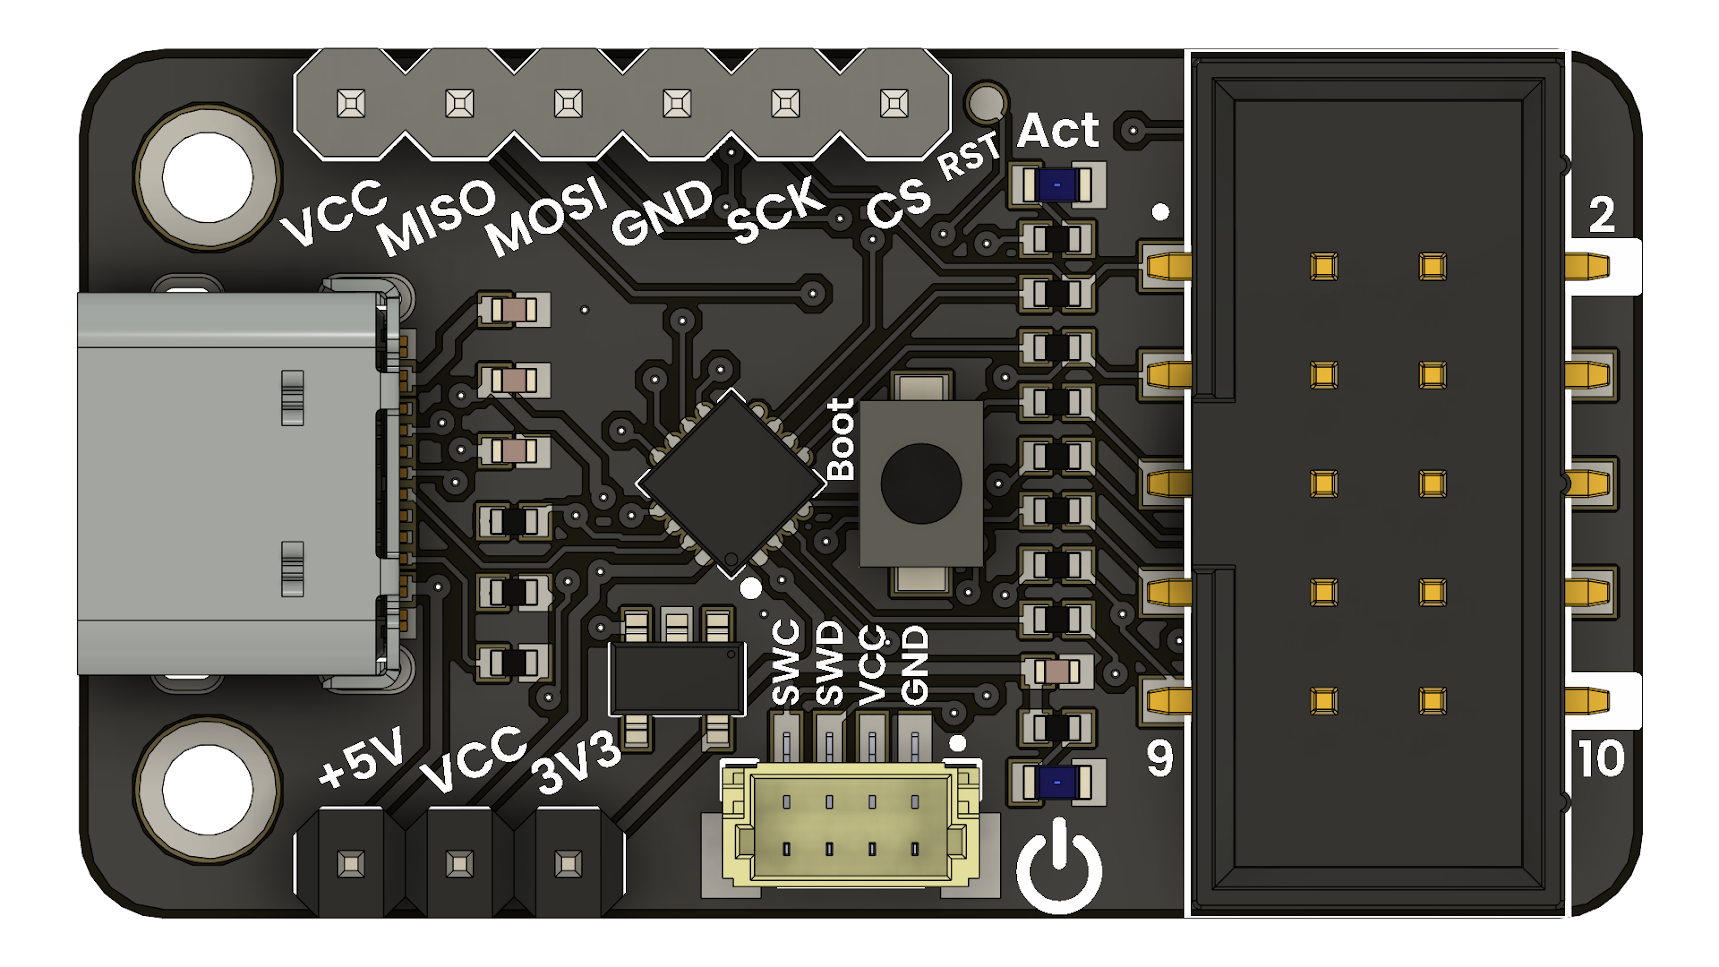
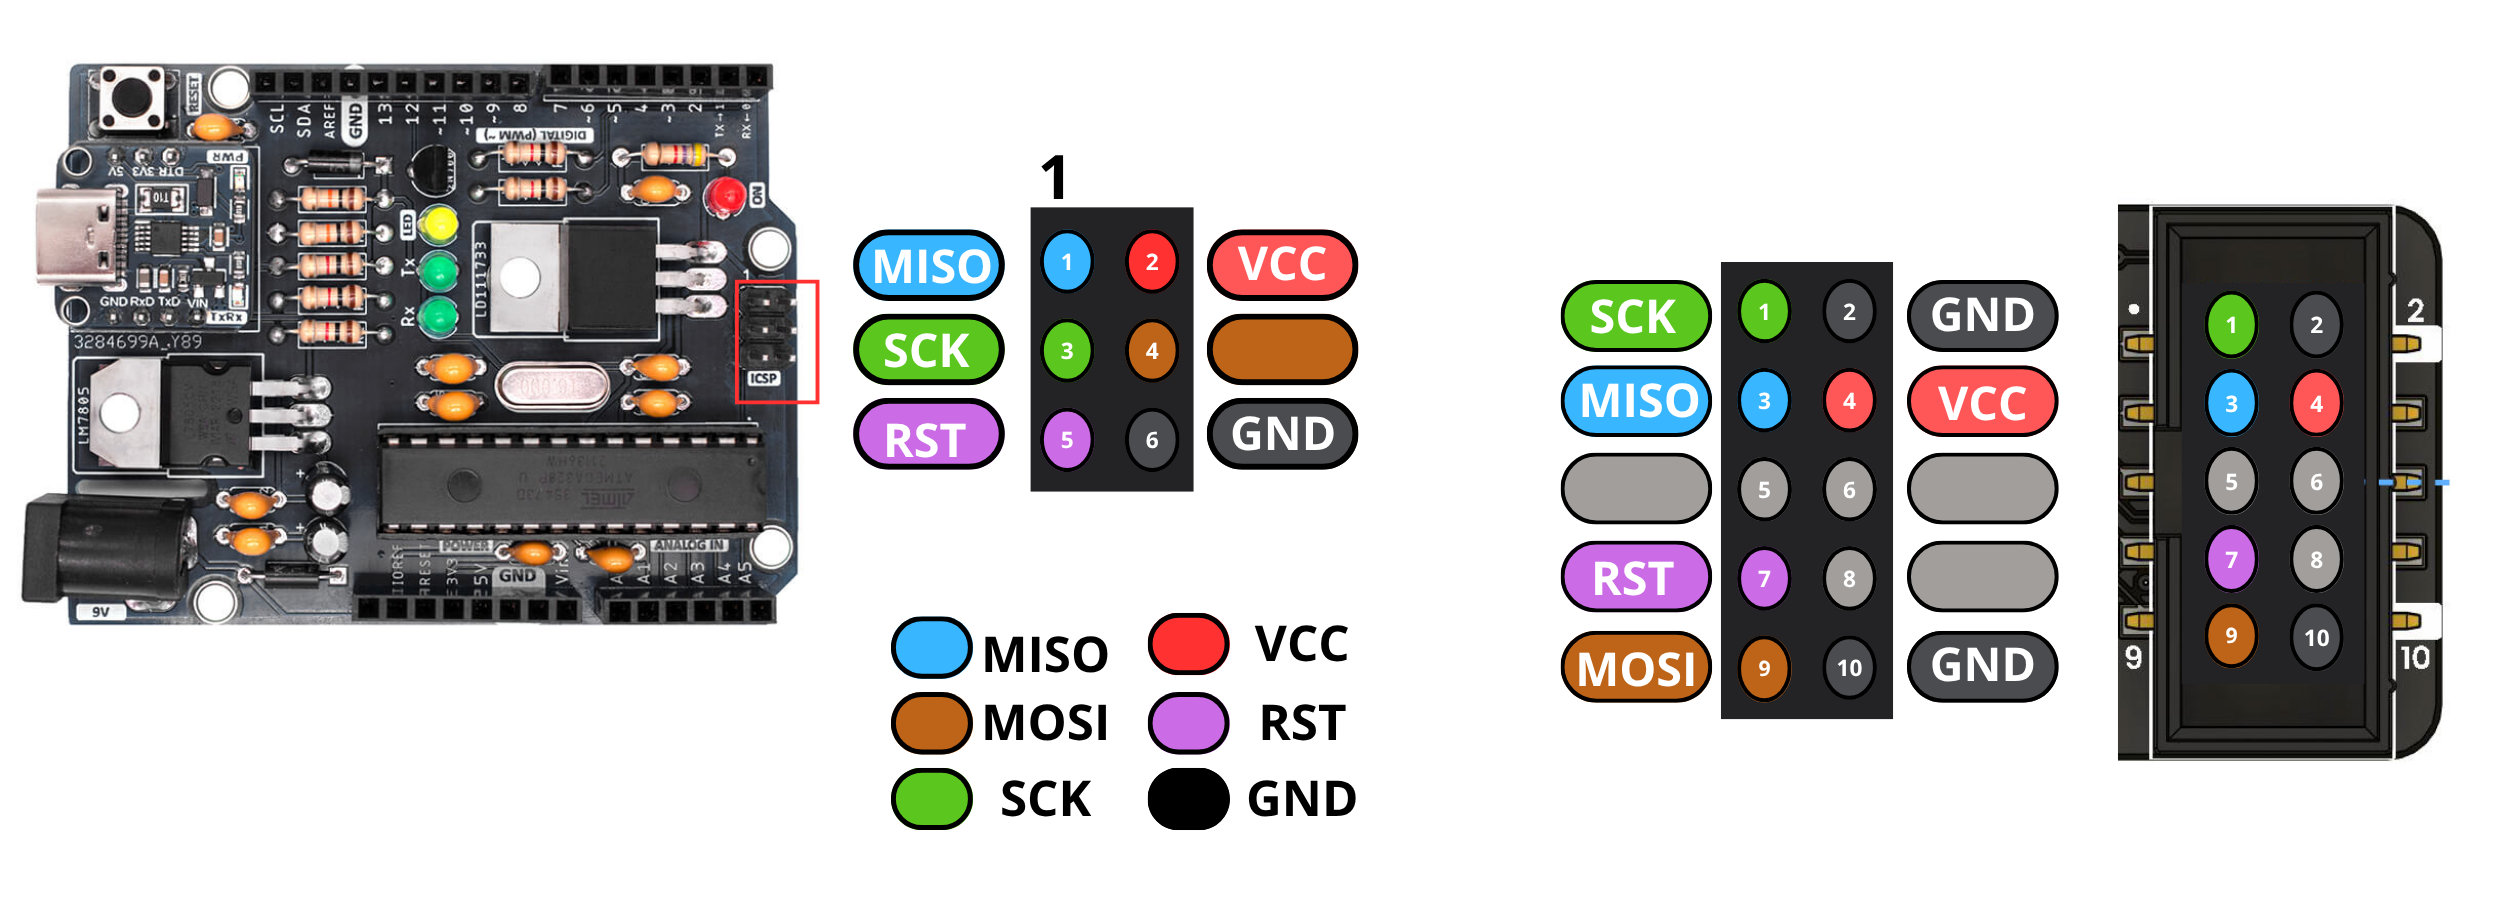
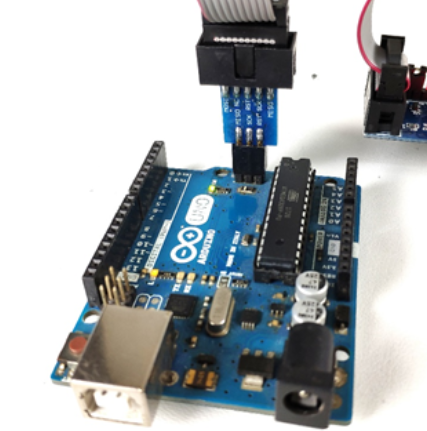
Use the FC cable to connect one end to the UNIT Multi-Protocol Programmer and the other to the ICSP interface of the ATMEGA328P.
Make sure the MISO pin of the programmer is aligned with pin 1 of the ICSP header on the ATMEGA328P.
ICSP Connection Overview
Driver Setup with Zadig#
To allow USB communication between your PC and the programmer, install the required drivers using Zadig.
Step 1: Identify the COM Port#
Connect the programmer to your PC and open the Device Manager. Under Ports (COM & LPT), identify the COM port assigned to the device.
Step 2: Open Zadig#
Launch Zadig. You should see a window like the following:
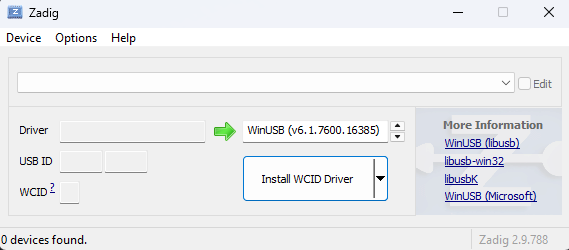
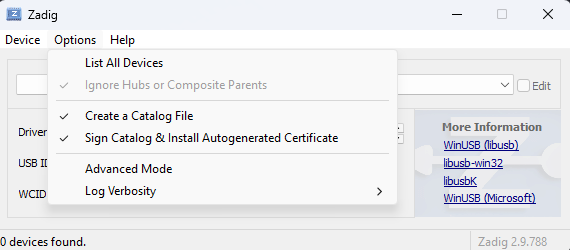
Click Options → List All Devices to display all USB interfaces:
Step 3: Install Drivers#
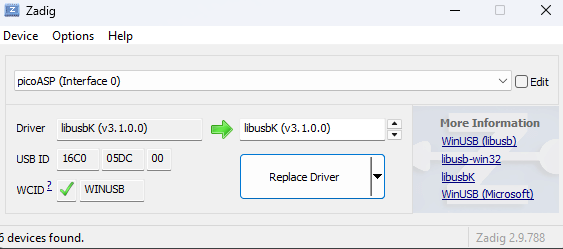
Install the following two drivers:
picoASP Interface 0: Install the libusbK driver by clicking Replace Driver.
SerialUPDI Interface 1: Install the USB Serial (CDC) driver by clicking Upgrade Driver.

Once both drivers are installed, your UNIT Multi-Protocol Programmer is ready to flash the bootloader.
Bootloader Installation Using Arduino IDE#
Open the Arduino IDE and follow these steps to burn the bootloader onto your ATMEGA328P.
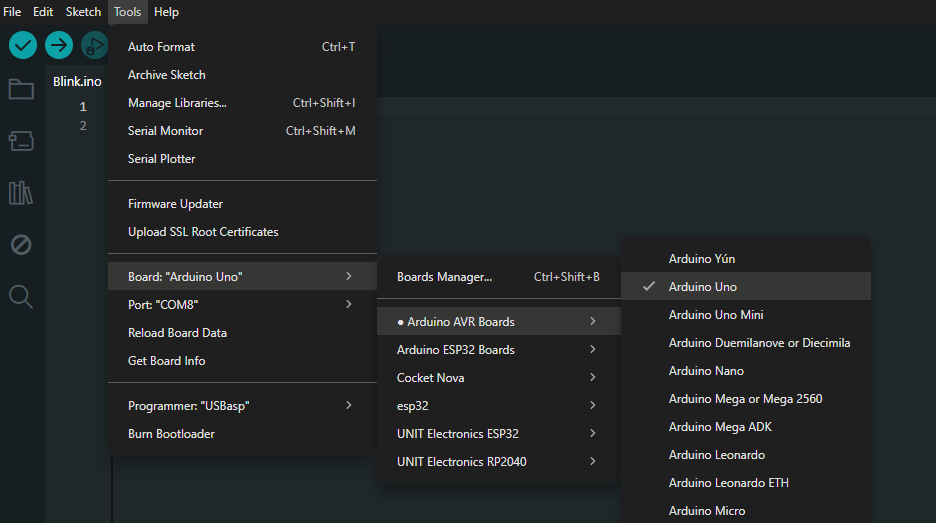
Select the Target Board
Navigate to Tools → Board and choose ATMEGA328P.
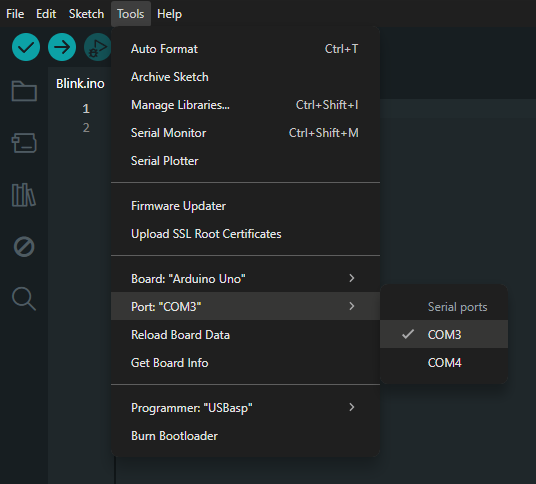
Choose the Correct Port
Under Tools → Port, select the COM port corresponding to your programmer.
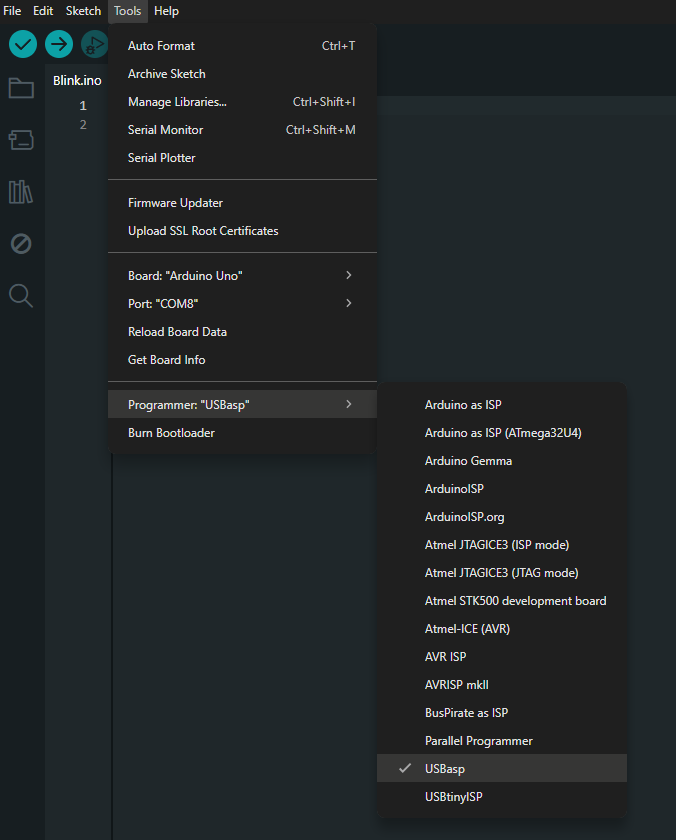
Select the Programmer
Under Tools → Programmer, select the programmer (e.g., USBasp or your custom driver name).
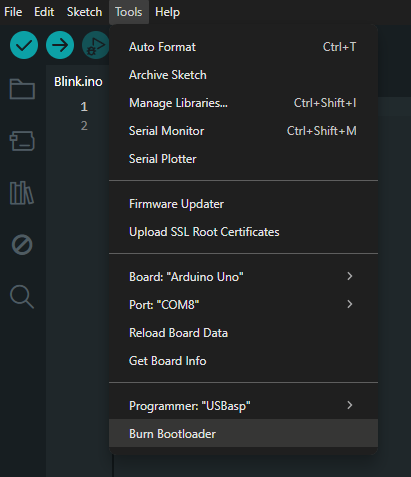
Burn the Bootloader
Finally, go to Tools → Burn Bootloader.
Success! Your ATMEGA328P now has a compatible Arduino bootloader installed and is ready for development.